
DIY Pet First Aid Kit
Pet First Aid Kit Checklist
Use this comprehensive checklist to put together your own pet first aid kit.
None of us want to think about our pet getting injured or sick. But, the reality is, it can happen. We can try our best to keep our pets out of harm’s way but sometimes all it takes is one moment.
The best thing we can do is be ready with everything you need. Don’t be scared-be prepared!
One thing we should all have is a pet emergency first aid kit. Just in case. We all hope never to have to use it but, boy, is it a good idea!
So, what supplies do we need for your own pet first aid kit and how do you pack them into a portable kit to have ready in a moment’s notice?
Disclosure: As an Amazon Associate, I may earn a small commission, at no extra cost to you, if you click a link and make a qualifying purchase.
Creating Your Pet First Aid Kit
The first thing is to find a spot where you can store your pet first aid kit that’s easily accessible when you need it.
I have a little pet station that I’ve put in a plastic drawer system right by my front door. In the top drawer, I have a pet first aid kit.
If there’s a situation inside or outside our house, we can quickly grab the kit.
I also have extra supplies that won’t fit in the portable kit like a blanket, towel, and a leash. These sit in the same plastic drawer so the whole drawer can be pulled out and taken to a pet if needed.
There are many pet first aid kits available for purchase, such as Everlit Pet Medic First Aid Kit. These are a good start but you may want to add some extra supplies.
I found that the ones available had a lot of the things I wanted for my first aid station, but not everything I thought was necessary or helpful.
I made my own checklist and compiled it here so you don’t have to figure it out yourself.
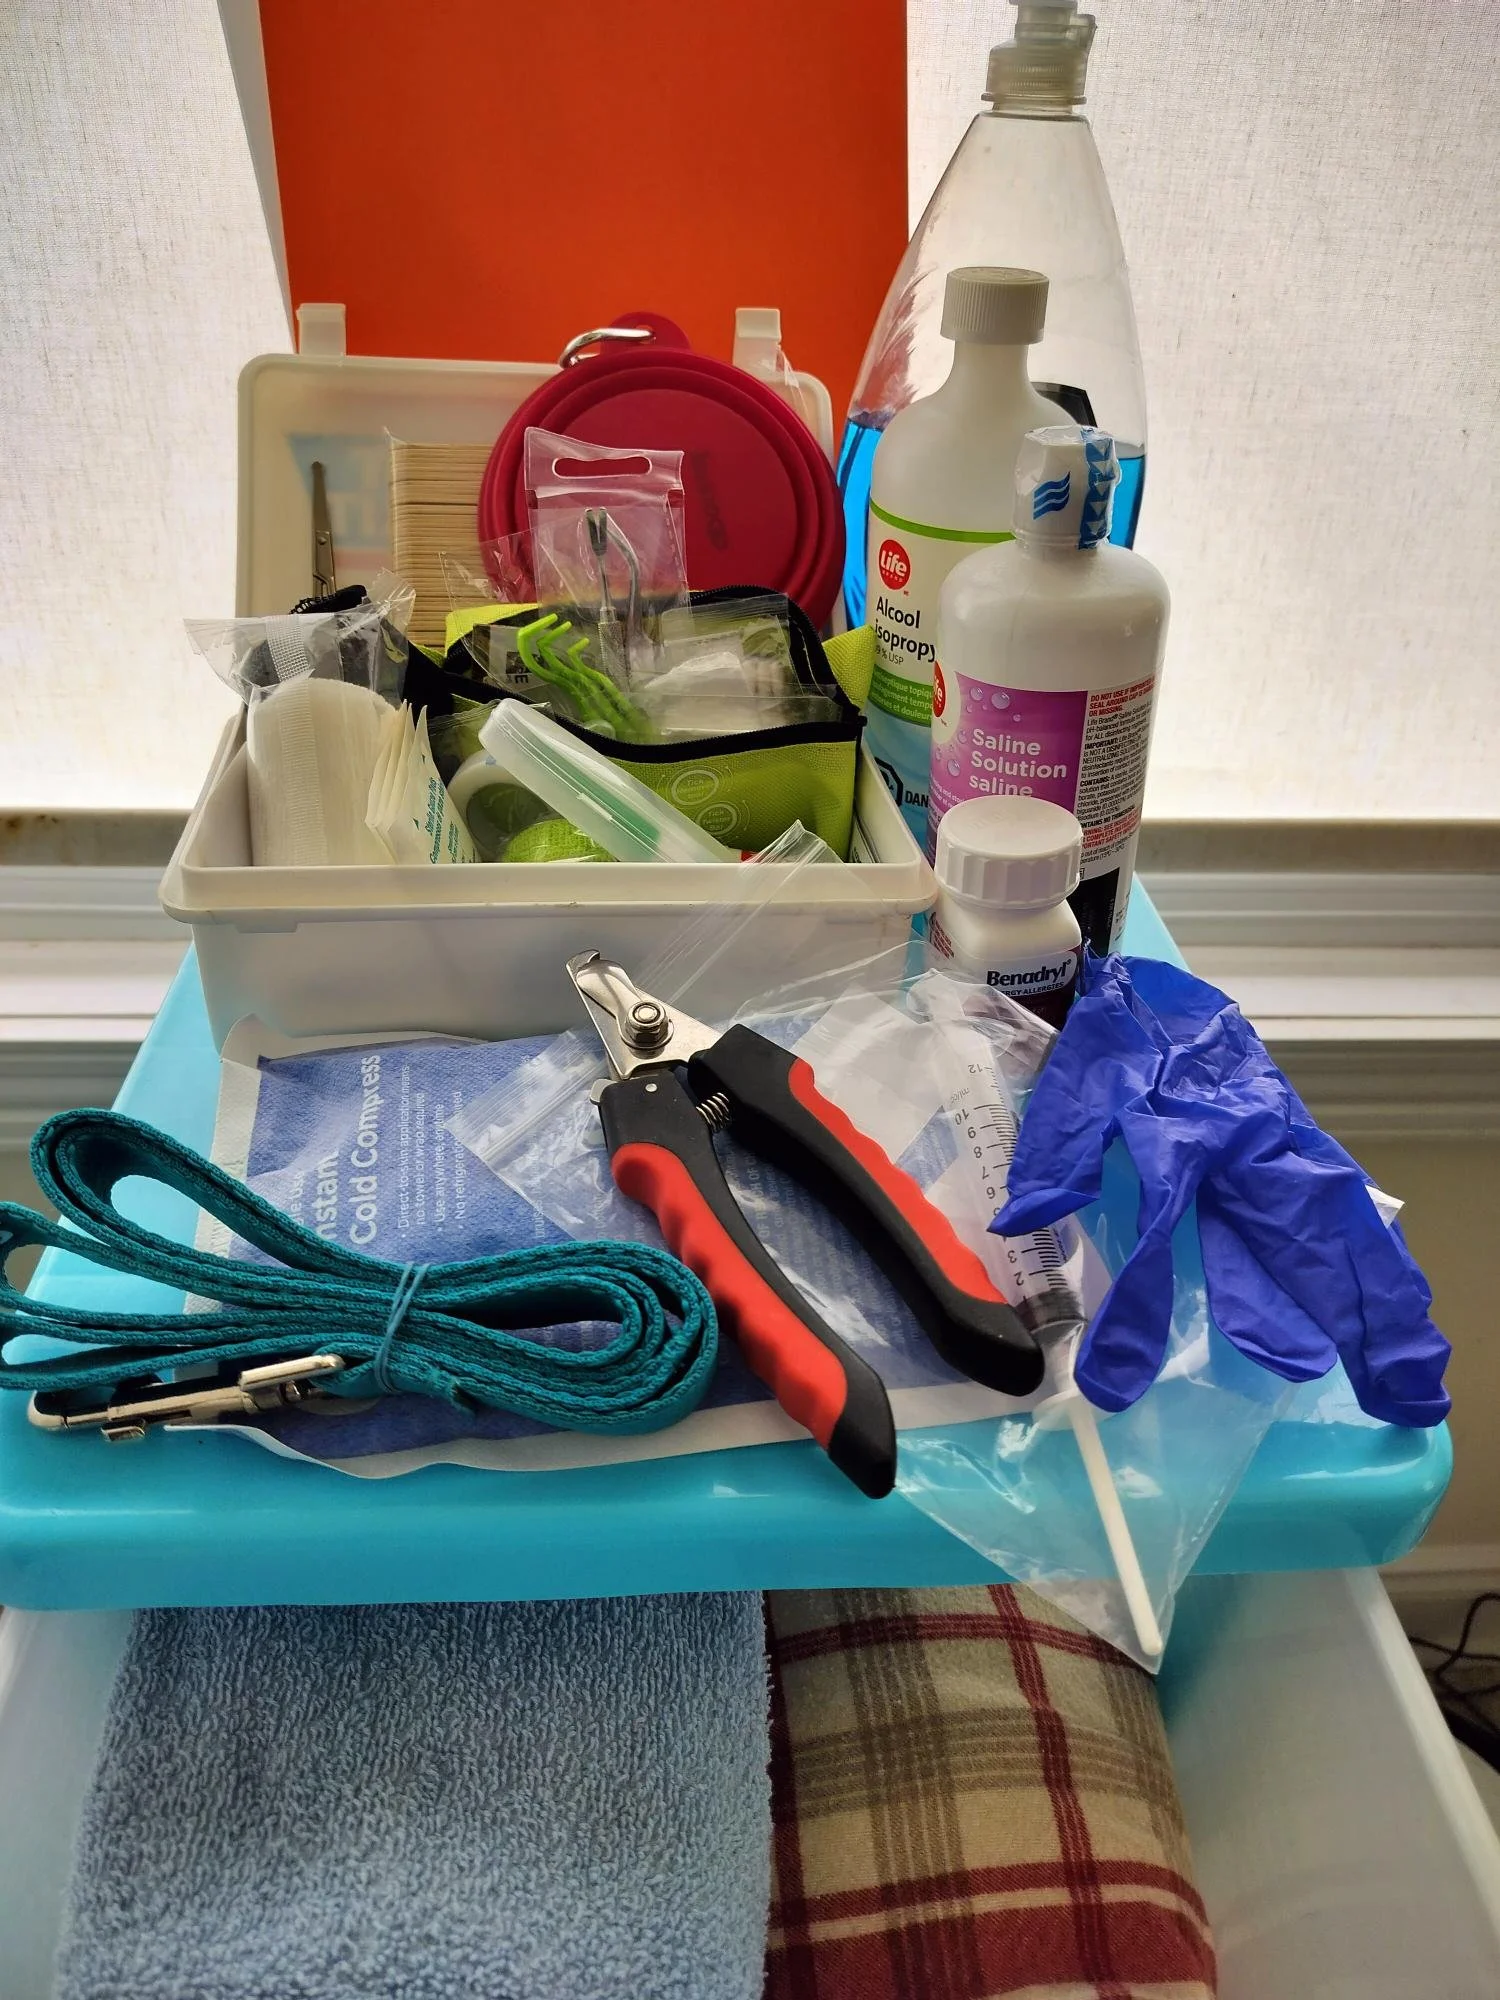
Our DIY Pet First Aid Kit
Everything we need for this pet first aid kit fits in one drawer of a small plastic shelving unit.
The most vital items fit into the first aid kit(spread out here to show the contents) but the whole drawer can be removed for a bigger emergency.
Pet Information:
Emergency Pet Information Form- You need a place to keep track of your pet’s vital health information, current immunization records, and important contacts such as your vet contact information, the nearest emergency vet contact, and the pet poison hotline for your area. Download your own copy by clicking the link below to have all the information you need available at a moment’s notice!
Immunization Records- If your pet needs emergency care, there are situations where you may need to have access to current immunization records.
For instance, if someone tries to help your pet and they bite out of fear or pain, you will need proof that they’re vaccinated for rabies.
I have the Emergency Pet Information form and pet immunization and medical records in a folder with my pet first aid kit for easy access at any given moment.
Tools and Materials
Blunt-end Safety Scissors- These are helpful to have on hand to cut bandages, tape and even trim a little fur where needed. Use scissors with blunt ends so you don’t end up poking your poor pet if they are struggling and squirming.
Gauze Pads- You can include a couple of different sizes or, at least, large ones that can be trimmed to the right size.
Gauze Roll- Use to hold gauze pads, splints, etc. in place.
Self-Adhering Wrap- To quickly and easily secure bandages and gauze in place without having to tie off or tape the bandage.
Tongue Depressors- Can be used as small, sturdy splints for stabilizing limbs, to safely inspect a pet’s mouth and airway, to stir medications, and to apply ointments or creams.
Tweezers- Useful for removing shards of glass, thorns, splinters, and ticks(if you can’t get at it with a tick removal tool or a piece of tick is left behind).
Tick Removal Tool Kit- Even though my dog is on a tick prevention regime and we keep covered to prevent ticks on ourselves, having a tick removal kit on hand, such as this one, is a simple way to ensure that if you or your pet gets a tick, you can remove it easily.
Digital Thermometer- Get a pet-specific flexible digital thermometer so you can quickly get a reading. Don’t forget the lubricant!
Cotton Swabs- These can be used to clean wounds, sensitive areas like eyes or ears, or applying styptic powder to stop minor bleeds like nails cut or torn to the quick.
Oral Plastic Syringe- This can be used to flush wounds, give medication, or giving your pet hydration.
Disposable Gloves- Non-latex, disposable gloves can protect your pet from human bacteria in wounds and protect you from bodily fluids such as blood, vomit, or saliva.
Instant Cold Packs- Used for swelling and pain relief.
Topicals and Medications:
Antibiotic Cream or Ointment- Choose an antibiotic ointment or cream that is safe for pets and keep on hand to treat minor wounds and abrasions.
Saline Eye Wash- Use to flush debris out of your pet’s eyes or rinse a wound.
Styptic Powder- This powder can be used to stop minor bleeding.
Benadryl(Diphenhydramine)- This antihistamine can be used for allergic reactions, insect bites, bee stings, and motion sickness. Always consult a veterinarian before administering this medication to determine the appropriate dosage and usage for your pet.
Petroleum Jelly/lubricant- Use petroleum jelly(Vaseline) or water-based lubricant with the digital thermometer to take your pet’s temperature rectally for the most accurate reading.
Alcohol Wipes- Used to clean and disinfect wounds and scrapes.
Hydrogen Peroxide- Can be used to induce vomiting in pets in case of poisoning(always consult a veterinarian or pet poison control hotline).
It can also be used along with baking soda and dish soap to make a very effective skunk-scent remover. See the article, What to Do If Your Dog is Sprayed by a Skunkfor the recipe and more information.
Baking Soda- Used with hydrogen peroxide and dish soap to make a skunk-scent remover formula.(see above)
Dish Soap- Grease-cutting dish soap, such as Dawn, can be a very effective wash to cleanse toxins, oils, or chemicals from your pet’s fur. It can also be used as a DIY skunk-scent remover when combined with baking soda and hydrogen peroxide.(see above)
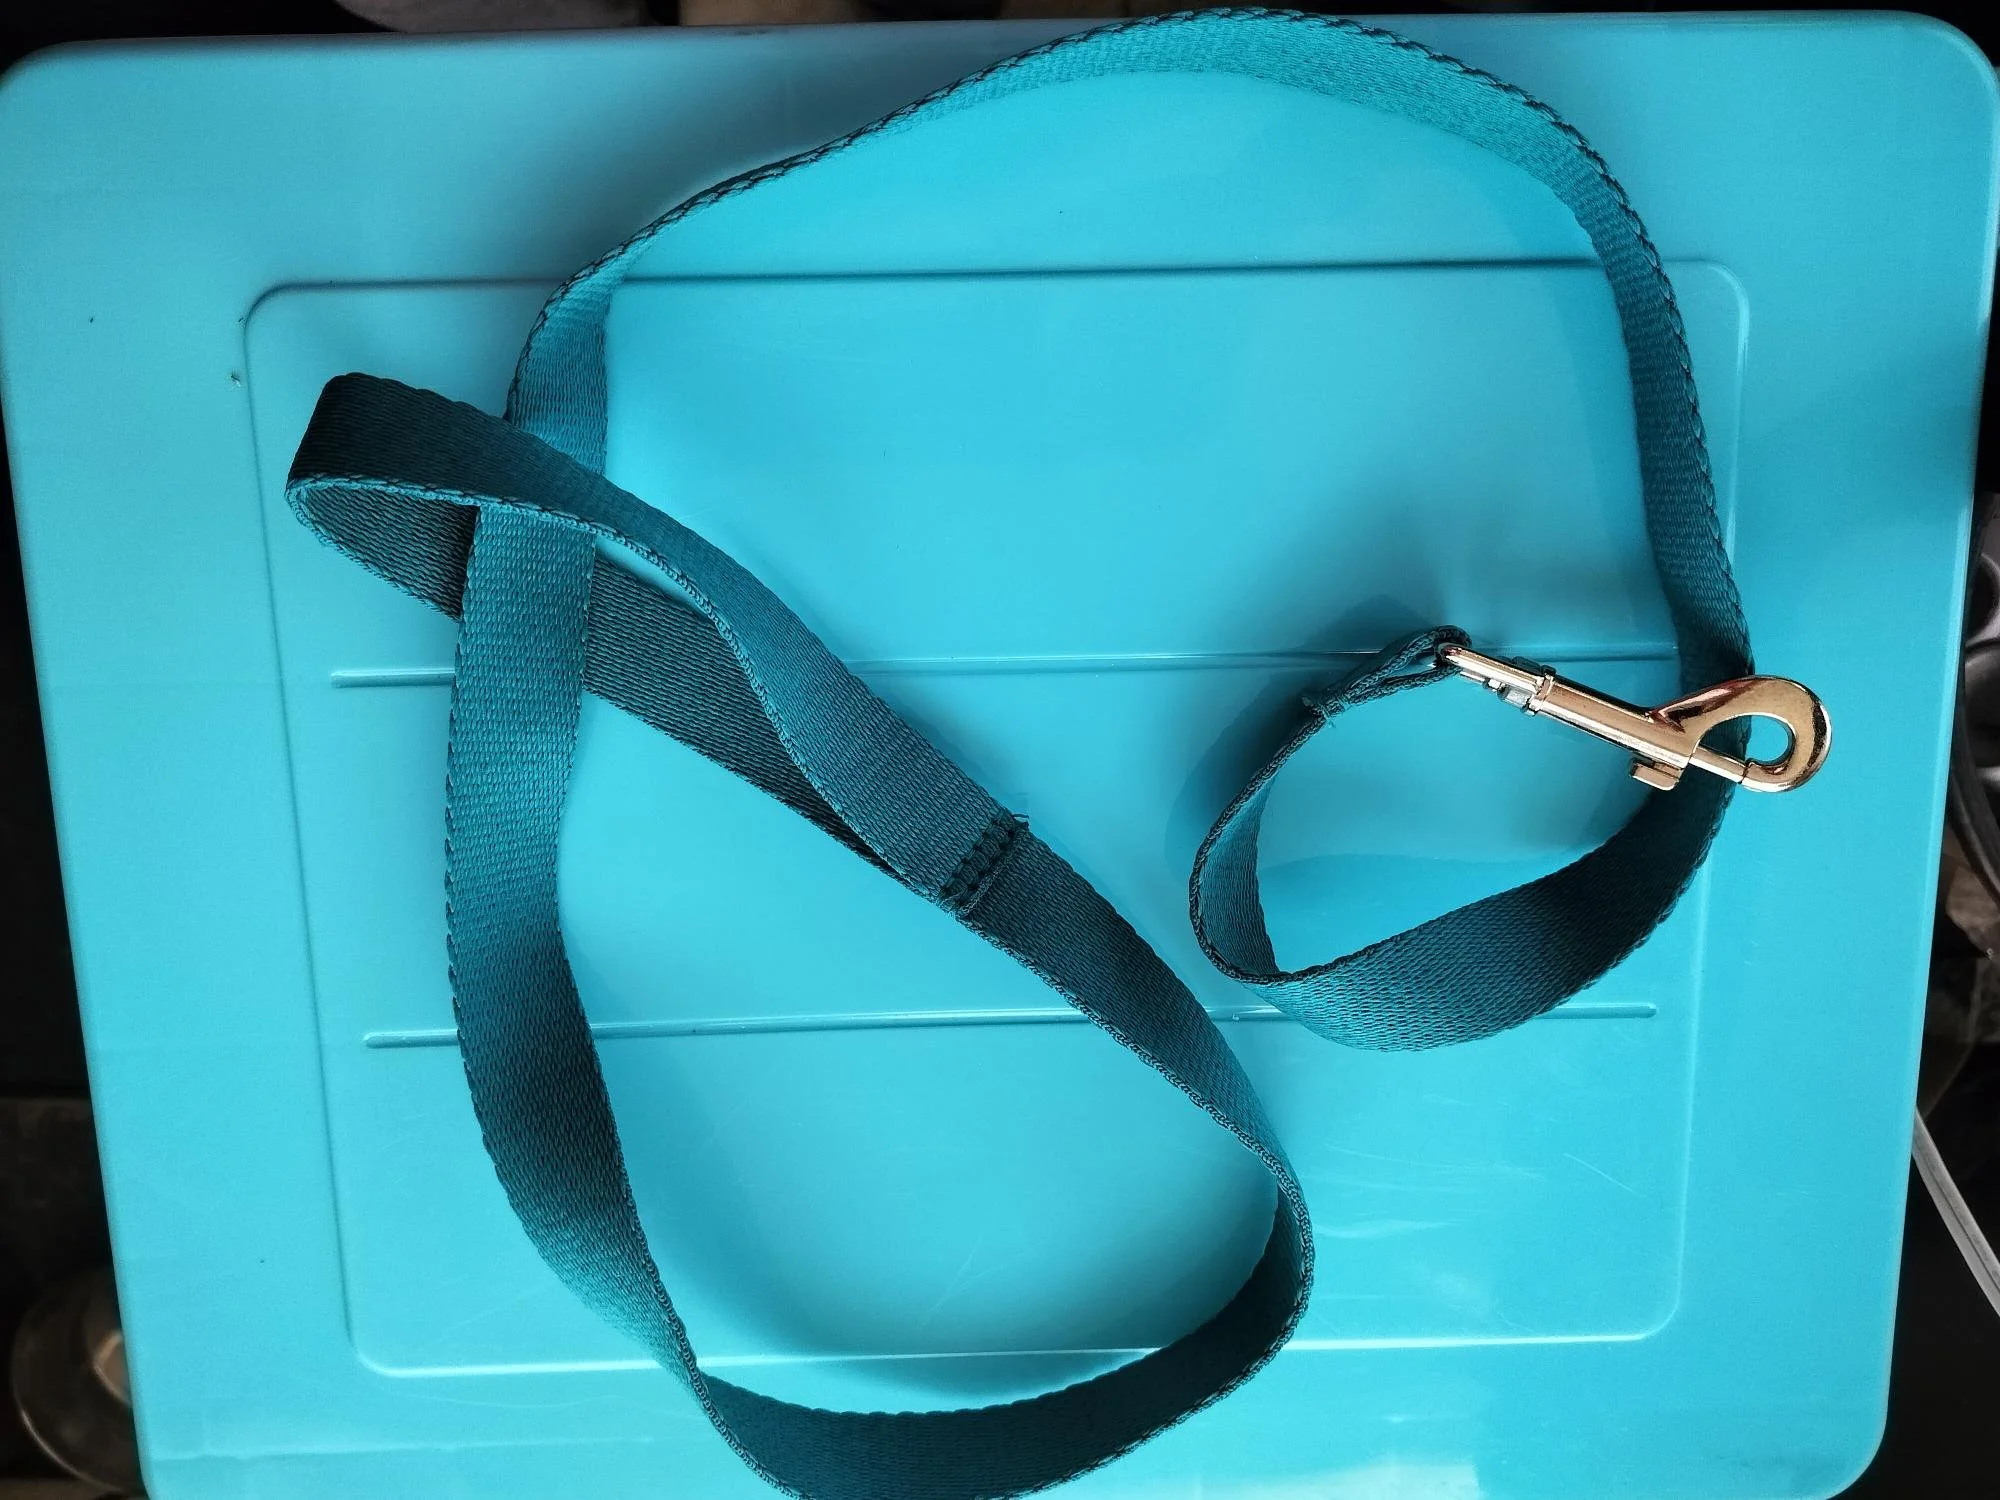
Regular Leash Becomes Slip-Lead
You can take a regular leash and turn it into a slip-lead to secure a dog who has no collar or harness.
The dog’s head goes through the loop on the left and the clip end becomes the handle.
Miscellaneous:
Leash- Keep an extra leash on hand to capture a loose dog. You can turn it into a slip-lead by looping the the leash through the handle in case the dog has slipped it’s collar and has no harness.
Soft Muzzle- Dogs who are in pain or scared, even the friendliest ones, may bite or nip. Use a soft muzzle or use a strip of gauze if you don’t have a muzzle and your pet is trying to bite.
Blanket- Can be used to keep an injured pet warm, manage shock, or to safely restrain them for transport.
Nail Clippers- Used to quickly trim snagged, broken, or torn nail to prevent further injury and pain.
Penlight/Small Flashlight- Pet emergencies don’t always come with perfect lighting. A small flashlight can be useful to examine injuries.
Collapsible Bowl- A bowl can be used to give water to your pet if overheated or dehydrated. They can also be used to mix cleaning solutions for wounds.
Washcloth/Towel- It’s always good to have a washcloth and/or towel on hand to clean up your pet and dry them. Microfibre is particularly good for this task.
Pet First Aid Guide- Even if you take a pet first aid course, having a reference guide is very useful.
Remember: Don’t Be Scared, Be Prepared
Having a pet first aid kit may be vital to your pet’s health, and even their life.
Find a handy place to keep it, piece it together from a kit or completely DIY it.
Make sure the contents are kept up to date and replenished.
And don’t be afraid to take a first aid course to learn how to use it. There are plenty of great courses available in-person or online.
You may use this pet first aid kit to save your own pet or another pet in your neighbourhood who needs your help.
If you never have to use your pet first aid kit, be thankful.
But if you ever need it, you will be even more thankful that you have it!